Mrs. Ryan's Class

A Digital Learning Hub for students and parents

Beginning Stages of My Digital Portfolio

This has been a week of learning. First, I decided to edit all of my content to fit the purposes of this digital portfolio. I wanted to be sure that my work is specific to me as a professional, not necessarily to my role as a student at the University of New Haven. Therefore, I reformatted my tutorials, technology reviews, and lesson and unit plans, and edited content to make it more applicable to a wide audience. I organized everything into folders in my Google Drive and referred to my revised site-map for help. Finally, I thought, I’m ready to begin uploading and designing!  

target

However, after over 7 hours and slow progress learning three different platforms I am feeling overwhelmed!

I decided to create a Google Site to house my digital portfolio, but I faced a huge uphill battle and learning curve. I watched tutorials, read articles, and found a portfolio template that I thought I liked, but the overall process was frustrating. When I finally was able to add content, I absolutely hated the way it looked. When I tried to reformat the layout, I was met with more roadblocks.

Then I turned back to WordPress.com to see if I could either create a new site altogether, or simply add a page to my existing Digital Learning Hub. After some reflection, I decided to keep the Digital Portfolio separate from my Digital Learning Hub and start fresh. I used this informational link from WordPress  to help, but I found that many of the portfolio templates are designed for images/photography and did not really fit my purposes.

I didn’t give up completely on either Google Sites or WordPress, but I still wanted to search for something that was more straightforward to create, visually appealing, and fit my purposes for my digital portfolio. After reading some of my classmates’ blog posts on their journey into e-portfolio creation, I decided to try out WIX.

wix

I found a visually appealing, free, portfolio template and I am currently trying to work through personalizing my site and uploading content. I found an app to add to my WIX account that allows users to upload content from Google Drive. I hope this will make adding content easier!

I am realizing now why creating websites/digital portfolios takes so much time and dedication. It is not easy to build or manage, and it takes a lot of persistence. I keep trying to think back to Carol Dweck and the growth mindset. I am learning…and that is what matters.

2 Comments »

Digital Portfolio: Site Map


Step Two in planning my Digital Portfolio is to create a sitemap to organize my ideas. I started planning using a digital graphic organizer, Popplet.

popplet logo

I learned about Popplet through research for an assignment in another IT/DML Class about Assistive Technology.  In this assignment, I recommended using Popplet as an AT for students who have difficulty using traditional print graphic organizers. Although I had researched the tool and experimented with its functionality, I had never used it for my own authentic planning purposes. I found that the flexibility in placement and organization was extremely helpful and I will definitely recommend using this resource with kids!

The actual planning of my sitemap was challenging and took several days. In retrospect, I wish I had done a mini-curation process at the end of each course to select my most meaningful work that I would eventually like to share.

regret

Since I did not curate my content as I worked through this program, I had to go back to every course and sift through each assignment to determine which work should be included in my portfolio. This helped me to reflect on all of the work that I completed in this program and I was able to pull out the most meaningful assignments. Looking back, I’m quite proud of some of the work I created and I also realize that there is some content that was intended to serve the purpose of reflection, learning, and growth. I am happy to have the opportunity to create a digital portfolio that highlights the work I am proud to share and that is most relevant to me as a professional.

Here is the Popplet that I created to organize my ideas for my digital portfolio.

Popplet Image

See this link for a larger view: http://popplet.com/app/#/3341587


eggtimerSome of the content that I plan to include will need to be edited to apply to a wider audience. Many of the courses that I created these materials for has specific requirements for audience, so I intend to go through each lesson, tutorial, and resource and edit when necessary. I anticipate that this will be a long process that requires significant effort and reflection, so I plan to get started right away!


Image Sources:

Popplet Logo

Regretful Baby

Timer


Leave a comment »

Digital Portfolio…Platform Considerations

It is time to begin the initial planning for my digital portfolio. I have decided to use this portfolio to showcase my work in the IT/DML program and I intend to add to the portfolio as I develop additional content related to teaching with technology. I anticipate that my audience will be colleagues who are looking for ideas and/or resources, and any potential future employers if I decide to leave classroom teaching and pursue a different career, perhaps as a tech integrator? I am not going to design this portfolio specifically for job searching at this time, but I am open to the possibility that I may edit the portfolio later to serve this purpose.

Right now, my biggest hangup is with my domain name. All of my multi-modal tutorials and presentations end with a reminder to check out my blog for other resources. This WordPress blog (nicolelryan.wordpress.com) has been the location of my Digital Learning Hub since the start of this program, and I’m not sure I want to entirely shift my focus to a different platform entirely. I did a bit of research on changing the format/layout of this digital learning hub to one that would function better as a portfolio. This page, “Your Portfolio. Your Website” gave me some interesting ideas about layout and content.  I love the different portfolio layouts and find the templates provided here to be visually appealing and user friendly. I imagine that visitors to my portfolio would have an easy time accessing my content. It also seems to be customizable so I could have a lot of flexibility in the design. I do worry, however, about completely deleting/revamping my Digital Learning Hub that I already created. If I changed themes to a portfolio, I would lose a lot of content and organization that I worked hard to create. I want the students and parents in my class to have access to this site to provide important information and resources. I could, perhaps, create a brand new WordPress account using the portfolio layout, but then I would have a new URL anyway, thus defeating the purpose of sticking with WordPress.

My next thought would be to create my digital portfolio on Google Sites. I have some experience with creating sites (mostly from preparation for my Level 1 GAFE Certification Test), but I do not have a Google Site of my own. I have been interested in using Sites in the classroom, and eventually having my students create their own, but I have yet to ventured down this road. I’m thinking that using Google Sites for my own digital portfolio would give me an authentic and personal experience with the tool that will help me later when using it with students. I did some preliminary research to see what other teachers have to say about using Google Sites as digital portfolios and came across this helpful webpage, ePortfolios with Google Appscreated by  Dr. Helen Barrett. It is clear that Google Sites is a versatile and user-friendly resource for digital portfolio creation. Additionally, this site containing template descriptions was also helpful as I navigated the seemingly endless template options within Google Sites. One drawback of the Google Sites templates is they can be quite bland, and I wonder how much flexibility I will have when it comes to design. I could also choose not to use a template and try designing my own pages in Sites.

I am going to begin work designing my digital portfolio in Google Sites to try something new that I could potentially use with students in the future. I hope that I find some flexibility and room for creativity and personalization once I begin. I know, though, that this resource will change with me over time.

4 Comments »

Reflection on Teaching with Technology & Digital Portfolio

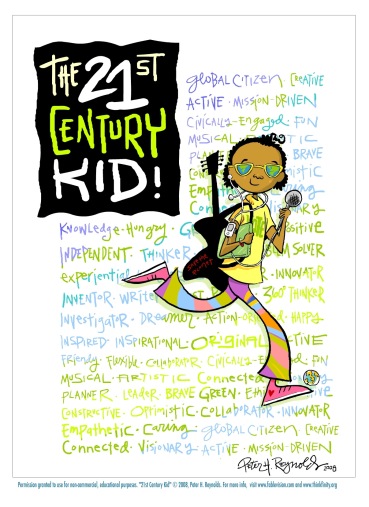
21st century kid

Image Source

As my journey through the IT/DML program nears an end, I will begin the reflection and curation process required to create a digital portfolio of my work in this program. Two articles informed my reflection this week. The first article I read called 11 Essentials for Excellent ePortfolios, details 11 suggestions to consider when creating a digital portfolio. They are:

  1. Know Your Purpose
  2. Select Tools to Empower Students
  3. Select a Variety of Content
  4. Empower Portfolio Review and Publish to an Audience
  5. Know Your Timeline
  6. Empower Metacognition
  7. Relate Portfolios to Coursework
  8. Don’t Overwhelm Students
  9. Link Paper and Electronic Portfolios
  10. Consider the Portfolio’s Longevity
  11. Engage Teachers in Effective Portfolio Use.

Many of these areas for consideration are outlined in the scope of my final course, especially in regard to the timeline, audience, feedback, related and variety of content, and engagement. One area that sticks out, especially as I begin to edit and revise my teaching philosophy is suggestion one, “Know your Purpose”. The author of this article, Vicki Davis, suggests that the curation of a digital portfolio is constructivist in nature. This fits nicely into my philosophy of education that is heavily influenced by constructivism and personal meaning making.

Another influential article I read this week is, NAESP’s Technology Integration for the New 21st Century LearnerThis article explains reasons why students should construct their own knowledge through creation, exploration, discovery, and design, and how technology can help. As I read this article, I was reminded of the reasons why I so wholeheartedly believe that students should be the creators of their own learning. Blair, writes, “By allowing students to be explorers and designers, educators show that they believe in their students’ abilities and validate each student’s contribution to the class” (2012). I believe in the importance of developing a strong classroom community to allow students to feel safe to explore and design their own learning, while contributing to the learning of the whole class. I have held these ideas about education since I began my teacher prep. work years ago, and these beliefs have only become more engrained in my teaching practice over the course of my career. This article reminded me how technology fits into those ideals.

The process of rewriting my philosophy of teaching while undergoing the beginning stages of content curation for my own digital portfolio will offer me a unique opportunity to experience this constructivist learning environment as a student, rather than a teacher. Overall, my work as a student in this program has influenced my ideas about teaching and learning, and this final course will help me to showcase how I have grown as a learner and a teacher.


Leave a comment »

Formative Assessment

Please follow this link to my Storify post on Formative Assessment. It includes a helpful Google Slides presentation about how to use technology to make formative assessment more engaging, manageable, and efficient!

Click here for my Storify post

Capture

Click here for a direct link to my Google Slides Presentation on Formative Assessment & Technology


2 Comments »

Infographic: A case for online homework

download1This week I was asked to build an infographic related to teaching and learning with technology. As an elementary school teacher I have personally developed a love for online homework. I believe it engages kids in a meaningful way and can be appropriately differentiated based on students learning needs, time restraints, and ability level. I have been an advocate for online homework in my school, but I thought that building a simple infographic on the topic would help me to articulate these ideas more clearly to my colleagues.

Here is the final version of my infographic:

Online Homework in Elementary School.jpg

After some failed attempts with other infographic programs, I used the online resource, Piktochart, to create my infographic. I found the program to be simple and intuitive, but I had some issues with sizing images, adding “blocks”, and changing colors. I spent quite a bit of time learning how to use this tool and learned a few tricks that I will remember when using it again.

They are:

  • Watch and read the informational material provided by Piktochart
  • Instead of searching for the right color match in each block, type in the code for the color in the small box: 

grab2

  • Before creating the infographic, select the most relevant quotes/data/statistics to include that are vital to your message (too much curation during the creation of the infographic gets very overwhelming)

I would consider using infographics with my elementary aged students because of the evaluation and creative requirements of the project. Creating this infographic helped me to find relevant sources to defend my position, while keeping the message clear and concise. I would definitely provide my students with scaffolding and require extensive planning upfront to avoid frustration with the tool. This would detract from the learning and growth that is possible through the creation of infographics.

I used the rubric created by my professor to determine the critical information and graphics to include in my infographic. Without this guideline, I would have had a much harder time creating my final product. When I use infographic with my students, I will absolutely include a modified, abridged, and age-appropriate version of this rubric that outlines the requirements and provides guidance. I also took the advice from my colleagues in the planning stages and included information like screen time recommendations from the AAP and image planning.

Infographics seem like a great way to relay critical information in an easy-to-digest, user friendly format. I can see myself creating more infographics to send to the parents of my students throughout the school year. Infographics allow the flexibility to front-load information and explain an opinion all while supporting the topic with data and research. I think they are a valuable resource that I intend to use in my career both as a teacher and technology leader.  

2 Comments »

Make Tech Integration Work

Work…in every sense of the word:

Make technology integration WORK for you as an educator…

Make technology education WORK for your students…

Make technology education WORK as a successful tool to enhance and transform instruction…

Make technology part of the WORK of learning and creating.

16490051576_d463887d81

Using technology in the classroom should NOT feel like “just one more thing”. Purposeful technology integration can help you teach the required content while helping students acquire deeper levels of thinking and understanding.

One model to successfully integrate technology into your teaching is the SAMR model, designed by Dr. Ruben Puentedura. In this model, teachers are challenged to integrate technology to either substitute, augment, modify, or redefine existing lessons.

The_SAMR_Model

Watch my video on the SAMR Model to learn more about how SAMR can work for you in your classroom.


1 Comment »

Getting started with technology integration

Technology integration in the general education classroom can feel like a daunting task for any educator. The first step is to try not to be overwhelmed by the immense amount of digital tools and resources that are available. A good place to start is simple by thinking about what you want to teach, and then decide how technology can enhance the objective or elevate some aspect of student learning.

start


In the Eduopia article, Technology Integration Research Review, Vanessa Vega outlines three key elements of effective integration of technology. They are listed as:

  • “Students playing an active role in their learning and receiving frequent, personalized feedback”
  • “Students critically analyzing and actively creating media messages”
  • “Teachers connecting classroom activities to the world outside the classroom” (Vega, 2013)

In many ways, these indicators represent great teaching and student learning and could take place without the presence of technology. Technology, however, can enhance teaching and learning to make these elements more meaningful and accessible. I recommend that classroom teachers start by using technology to facilitate one of these key elements at first, and work towards full technology integration when appropriate.

Robert Marzano and John Hattie agree that at times, a lack of technology is appropriate to help students internalize content and make connections. These expert educational researchers have outlined multiple indicators of successful strategies for effective teaching strategies, and author Shaun Killian of The Australian Society for Evidence Based Teaching compiled a list of recommended teaching strategies called 8 Strategies Robert Marzano & John Hattie Agree On

Any teacher who wishes to enhance their content area teaching with technology should use this list of reasonable and realistic strategies to accomplish their teaching objectives. When I wrote the lesson plan Organisms in Our World, I chose three of Marzano and Hattie’s strategies to enhance an already existing lesson that I teach my third graders. I wanted to enhance my students’ experience with a real-world understanding of the Tundra Habitat so I used “Strategy 3: Get the Students to Engage With the Content” and included live stream videos from explore.org.

I also chose to enhance the content standard of the lesson, 3-LS4-3. Construct an argument with evidence that in a particular habitat some organisms can survive well, some survive less well, and some cannot survive at all using Marzano and Hattie’s Strategy  7: Get Students Working Together by assigning mixed ability partnerships, and Strategy 5: Multiple Exposures by including video, note taking, and online research on kid safe search engines (www.juniorsafesearch.com, kidrex.com, kidsclick.com). Finally, students take an active role in working toward this content standard through collaborative online content construction on a class blog on edublogs.org.

It is imperative to align technology to content standards to help our students work toward their highest potential. Our world is more connected than ever, and technology can help students become an active part of their learning and their world. The use of free technology tools can help students make connections, construct knowledge, and share ideas with a large audience. Free tools and web-resources like edublogs.com and explore.org help teachers anywhere enhance their teaching and student learning.


References:

Edutopia. “An Introduction to Technology Integration.YouTube. YouTube, 2012. Web. 17 May 2016.

Killian, Shaun. “8 Strategies Robert Marzano & John Hattie Agree On.” The Australian Society for Evidence Based Teaching. A+, 17 June 2015. Web. 15 May 2016.

Robert J. Marzano.Marzano Research. Web. 17 May 2016.

Vega, Vanessa. “Technology Integration Research Review.” Edutopia. 2013. Web. 17 May 2016.

“What Works in Education – Hattie’s List of the Greatest Effects and Why It Matters.” Granted and. 2012. Web. 17 May 2016.

3 Comments »

Sister Schools Project

MicroTalk on The Sister Schools Project located in Washington.

Link to presentation


Leave a comment »

Final tweaks to my hub…for now.

Since my last blog post I have made more changes to my hub. I was inspired to make these changes after more personal reflection, review of my classmates hubs, and feedback from colleagues at work. I can’t believe that I’m saying this, but it is finally ready to share!

My hub can be found at here at nicolelryan.wordpress.com (the same site that this blog is housed.) I have chosen to include information for students, parents, and colleagues. There are multiple pages (Students, Parents, Read Alouds, Curriculum, Teachers, About Mrs. Ryan, and Blog) most of which have pages linked to provide additional content for each specific area.

Wooden_hourglass_3

Though I am proud to share my work with my colleagues there are still more changes that I would make if I had an infinite amount of time.


In my last reflection, I set a goal to add more images to break up bulky content. I did integrate more images to various pages in my hub, but not specifically in the curriculum page as I originally intended. I have many pictures of my students engaging in learning that I wanted to include on this page of my hub. I specifically wanted to include one image of kids doing work in each content area. Although I have plenty of photos to choose from, I am still hesitant to share photos of my students publicly. None of these students are on the photo-opt out list, but I am still not completely comfortable with posting their images publicly online. Maybe sometime down the road I will be able to snap some photos of my students that do not show their faces. This would make me more comfortable with sharing.

I also created a section in my hub called “iPad Tips” in the Teacher section. My school has 3 iPad carts, and iPads are the primary tech tool that we use in the classroom, simply because they are the most accessible resource. I searched online and found three articles from Education World and Edutopia that I thought would be helpful for teachers who want to use iPads to support their daily teaching and student learning. They are, Education World: iPad Management TipsEdutopia: Resources for using iPads in grades K-2, and Edutopia: Resources for using iPads in grades 3-5.

The articles are straightforward, simple, and provide honest and realistic suggestions for teachers. The teachers who reviewed my website to give me feedback also found the articles to be useful and interesting. It is my hope that my colleagues who are not comfortable using iPads with kids can use these resources to find realistic ways to integrate technology into their existing curriculum and content areas. My school just purchased two Chromebook carts, so I would eventually like to find similar resources to provide support for teachers who are interested in integrating Chromebooks.

The last addition of content to my hub was two more read-alouds that I have read with my class, and a brief summary for each text. I anticipate adding to this section throughout the year to provide more information to parents who may be interested in reading the book at home with their child.

I also decided to change some aesthetics of my hub to provide easier access for students. First, I separated my multimodal tutorials in the student section and created one page for each tutorial. This way, my students don’t have to sift through lots of content to get to the tutorial they need.

My colleagues were a bit thrown off by the phrase “multimodal tutorial” which was on my site multiple times in the student and parent sections. I decided to change the names of the pages that house my tutorials from “____________ Multimodal Tutorial” to “How to use ___________.” I hope that this simpler naming scheme will help parents, students, and teachers navigate the site and find what they are looking for.

I also decided to change my static home page from “About Me” to a generic welcome message. I included the “labeled for reuse” image of a sun that is posted in my classroom and on all of my labels in school.

sun-47083_960_720

This bright, happy, sun is a common symbol in my classroom and will be easily recognizable for students to let them know that are on the right website!

I moved the content about my background and philosophy of education to a new page called “About Mrs. Ryan” for people to access if they choose. I anticipate that most people will come to my site to access content, not to review my credentials and read my musings on education. I do, however, still think it is important to include information about me somewhere in my hub.

Overall, I am generally pleased with the digital learning hub that I have developed, refined, and changed throughout this course. I hope it is a place that students, parents, and colleagues access and use regularly. I anticipate my hub being an ever changing resource that I improve and edit with experience and time.

Leave a comment »